Showing posts with label DIY. Show all posts

Friday, August 17, 2012

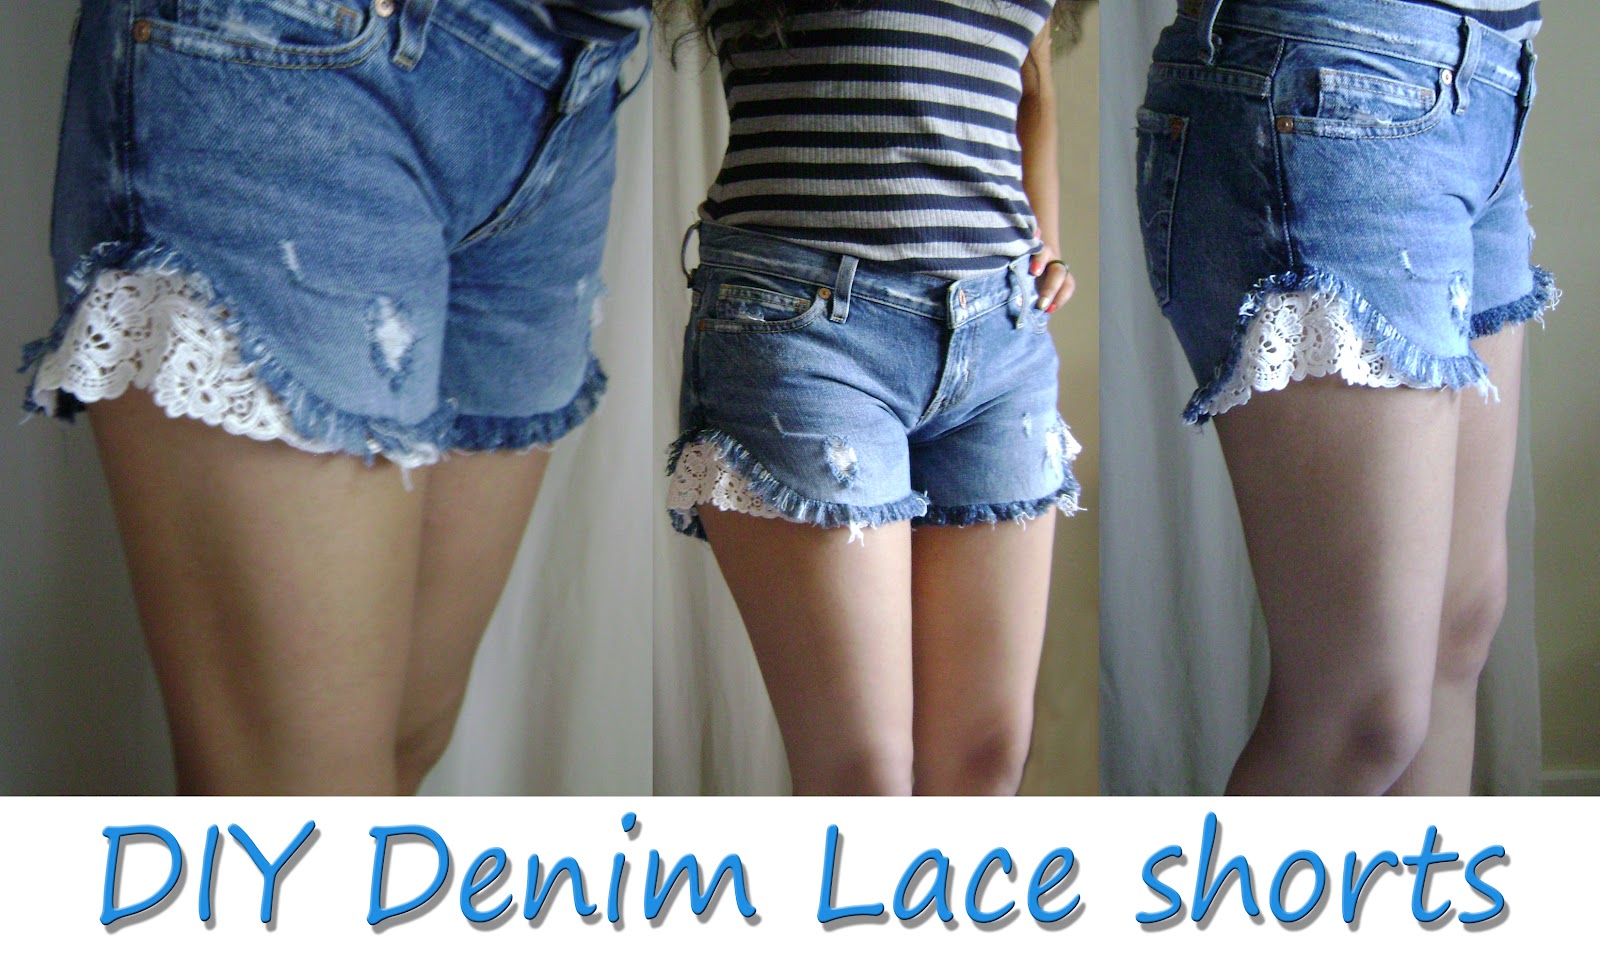
DIY: Denim Lace Shorts

How many of you have Jeans that out of style or they fit like high waters? I found a couple of pairs myself while cleaning out my closet, I was about to throw them in my donation pile when I remember I saw a pin of some denim shorts with lace on Pinterest, so I got my inspiration from that picture and  I quickly took a trip to the Fashion District Downtown LA to find some lace appliques. You don't necessarily need to go out and buy lace appliques you can use lace fabric or an applique from and old garment. This was a very fast and easy DIY anyone can do it! I wanted to revamp these old Guess Foxy Flare Jeans  but you don't need to cut up your jeans, if you have a pair of denim short you want to up date you can use those. Hope everyone finds this post helpful!


            What you will need:

Denim Shorts or turn an old pair of jeans in to shorts
Lace applique
Scissors
Pins
Pencil
Seam ripper
Needle and thread/or sewing machine

First you have to decide if you want your shorts shorter and how much of the side seam you want to cut off. I suggest putting on the shorts and measure how high up and how wide you want the opening on the sides to be and mark it, do this on both sides. Once you have your markings make a triangle shape on the side seam. I rounded out the edges just to give it a more cleaner look.
 Side seam view....
 Once you decide how much your want to cut off go on ahead and cut. once you cut off the excess you can now start distressing the edges of your shorts. You can use a seam ripper like I did it makes it easy and you have more control on how much and how far you want to distress the edges. You can also use sand paper and a X-acto knife but I find it easier to use a seam ripper.
 Distressing the edges is time consuming, but well worth it. Of course this step  is optional.
after distressing the edges you are now ready to pin your appliques in place and sew . You can sew on the lace by hand, using a blind stitch or you can do what I did sew along the edge of where you stop distressing. 
and finally the final product....
Thanks for visiting!


♥Ariana

Saturday, June 2, 2012

DIY: Simple Flowy Skirt

Hope everyone is ready for summer! I sure am here in Southern California it already feels like summer which I am loving ♥
So here is a very easy to follow Do-It-Yourself skirt, it very easy I finish it in about 15-20mins, If you are a pro will be super easy and fast to finish but if you are still learning I promise it wont take a whole day or weeks like some projects. Like I said its very easy and you probably wont need more than a yard of fabric, it all depends on how full or long you want the skirt. If you want your skirt to have a fuller look use a light- medium weight woven fabric, if you want a more flowy skirt use a light -medium knit fabric. I used a non stretchy woven fabric for mine but you can use what ever you like or have.You can make the skirt as long or as short as you want and you can even make a Maxi Skirt or make a fish tail/hi low skirt have fun with the hem!
If you would like me to do a separate tutorial on how to  make a fish tail/hi low skirt  leave a post on my Facebook page an like it too!


What you need:
*Your choice of fabric about 1yard depending on how long or full you want your skirt
*Elastic
*Measuring Tape
*Shears (fabric scissors) or regular scissors
* Sewing Pins
*Pencil or Pen or anything to make markings on fabric
*Safety Pin
*Thread and a Sewing Machine or if you don't have a sewing machine Thread and Needle will do.


First you will need to measure around your hips(hip circumference) if your not sure where exactly your hips are just measure 7"-8" below your natural waist. Make sure to measure around the fullest/widest part of your behind, take that measurement and add 1/2" to 1" to that measurement. Example: My hip measurement is 38"+1"=39"  

Once you have your hip measurement determine how long you want you skirt,(*make sure you add more depending on the width of the elastic and hem... for the casing and hem) 
cut 2 rectangle pieces with your width and length measurements
Take your elastic and measure your waist circumference, cut the piece of elastic to your measurement minus 1 inch.


Sew the side seams, sew a 1/2" strait stitch then sew a zig-zag for a clean finish edge....


Here's a closer look at the side seams, the zig-zag stitch is optional you don't have to do it. I just like to because it prevents the fabric from fraying and to give it a cleaner finished look.


Now you will create you casing for the elastic, the width of my elastic was 1".... so I folded over 1"+1/4"...the 1/4" is to fold under for a clean finish
sew the fold and leave about a  2" opening so you can insert you elastic.


Grab your safety pin and pin it through the elastic and close the pin... insert the pin with the elastic through the casing you just created...be careful don't let the other end go all the way through.


                 once you inserted the elastic, remove the safety pin and sew the elastic together.


Sew a square then to reinforce it sew an X inside the square. Then all you need is to close the 2" opening... and hem your skirt and you're DONE!


Finished Product


This can also be an alternative to a circle skirt!


Thanks for visiting!


♥Ariana

Friday, January 27, 2012

DIY: Bodycon Skirt Part 2

        OK so I know I already posted a DIY for a bodycon skirt, but it really wasn't very detailed. So this time around  I hope you can follow along a bit better, This time I took the time to actually take pictures of most of the steps, hope the visual helps... and if you make your own bodycon skirt I would love to see it! email me a pictures (my email address its on the About Me section to your left) or on Twitter @arianascloset
*NOTE: I used a vintage skirt(from my mom) as a pattern. It fits me perfectly! but if you don't have a skirt that fits you well you will need to make a pattern with your waist, hip measurements and decide how long you want your skirt. Make sure you leave at least 1/2" of ease besides the seam allowance.

  • First of course you will need any stretchy fabric preferably a Jersey Knit
  • Scissors
  • Pins    
  • A sewing machine or a serger

 First I took my fabric and folded in half, I lay down my pattern (skirt) 1/2" away from the fold and pinned it to the fabric.


Before you start cutting make sure you have left at least 1/2" of seam allowance in the side seams and at least 3/4" for the hem...after you double checked you have your seam allowance go on ahead and cut the fabric.


Since the waistband has to be on the fold you will have to cut another one , so you will end up with 2 waistbands, your front and back. 


So these will be your pieces: a front and back skirt and front and back waistband.


Now that you have your pieces cut out your are ready to start sewing. first fold the waistband wrong sides together


Pin the waistband to the waist of the skirt and sew a straight stitch. After you sew a straight stitch sew a zig-zag stitch on the raw edge just to give it a cleaner look. If you have a serger you don't have to worry on cleaning the raw edge.☺


Now that you sewed the waistband to the one side of the skirt you will do the same to the other side. Example: This is the front of the skirt now you will do the same to the back.

Once you have sewed  the waistband to both front and back skirt, you will place both pieces right sides together and sew the side seams. first sew a straight stitch then sewing a zig-zag stitch on the raw edges, Finally sew the hemline and you are done!  

                                                                      The finish product...


I also made a  leopard print skirt.


It kinda reminds me of the one that Kim Kardashian is wearing in this picture....


♥Ariana


Sunday, October 30, 2011

DIY:Turban Headband

Lately I've been into hats and headbands, I was never a hat person simply because my head is too small and most hats fit me too big but I don't let that stop me anymore. Recently I feel in love with the turban style weather it be a turban headband or just the turban it looks very bohemian. So instead of buying one that of course was not going to fit my little head I made some from left over Jersey I had. Its so easy to do and if you are a fabric hoarder like myself it will probably cost you nothing to make.

First you will need a jersey knit fabric you can also cut up an old T shirt. Cut 2 piece of fabric into 8"x24" of course it doesn't need to be perfect mine isn't.


Then you are going to fold both strips in half and sew.


Sew with a 1/4 inch seam allowance, only sew the bottom. 


Now turn the strips right side out....


and put one on top of the other making a cross or X shape.


fold one strip in half.


do the same with the other one...

The goal is to just have the two strips interlock with each other like so...


Finally you just sew the ends together and adjust if needed.


and it should like something like this......


I also made a black one. You can also add spikes to it or studs the options are endless. Hope everyone enjoyed the post.
Oh yeah I almost forgot have a good and save Halloween!


♥Ariana


Friday, September 2, 2011

DIY: Off the shoulder top

Lately I been in the mood of sewing, I been doing a lot of simple projects that I plan on posting very soon.  I made a couple of flowy off the shoulder tops that are great for the summer, yeah summer is almost over but here in LA is not leaving any time soon yay!!! I love wearing light weight flowy tops just because with this heat i don want anything clinging or skin tight I want to be able to breath!!! also lately I been wearing a lot of off the shoulder tops, I love my shoulders and I show them off  anytime I can, I think its very feminine and sexy. You don't need too show your Ta-Ta's to look sexy your shoulders and collarbone are just as sexy! anyhow hope you enjoy this post. 


 First you need your fabric any knit fabric with a little spandex will do. Whenever you are using a striped fabric always make sure you match the stripes together it will make you garment look nicer. 

Next all you have to do is decide how long and how wide you want the top to be, I am usually a size small or medium, From the shoulder neck to the bottom hem mine is about 27" long (including seam allowance) the shoulders are 8" long, the sleeve opening is 8" The neckline is up to you depending on how much you want it to hang off your shoulder. The width of my top is 20.

If you are afraid of making a mistake on your fabric you can always first make a patter on paper with your measurements and then tracing it on the fabric, but this top doesn't need to be perfect, its not supposed to looked tailored nor perfect, its just a simple and casual flowy off the shoulder top. Just try to follow the shape of the picture below.....


Once you cut it and sew it, turn it right side out and it should look somrthing like this......


               ♥Ariana

Saturday, July 2, 2011

DIY:Floral Bodycon Skirt

Yay I love DIY's! I made this a couple of weeks ago after giving up my search in stores for a cute Bodycon skirt. I didn't give up because I didn't like any of the ones I saw but more on how they fitted me it seems like all the stores think we are all one size! for some reason all the skirts I tried out were too short on me or too tight.I always have problems finding skirts mainly because I have wide hips and I have junk in my trunk for a skinny girl and to top it off I have long legs. So since i have a ton of fabric I decided to make my own, I love this bright floral fabric! its perfect for the summer... I love summer!!!

First you are going to need fabric try to use a jersey knit, something that has spandex and is stretchy. What I basically did was i already had a vintage bodycon skirt from the 80's and I used it as my pattern. I turned it inside out pinned it to the fabric. Then I cut the pieces and started sewing
*NOTE: the skirt doesn't have a hem, what I did is that I folded the fabric and placed the hem of the pattern on the fold. so the skirt has basically two layers, you can do this if your fabric is light weight or sheer.

                                                                       Front

Here's the skirt is inside out, you can see that their is no hem. 
I started by sewing the sides seams with a 1/2" seam allowance following by a zig zag stitch to clean up the edges. I sewed the waistband last. 

                                Here is a closer look at the waistband inside of the skirt.


 .........and here is the finished product on. Hope you enjoyed it


♥Ariana